When your weather damaged vinyl siding has your home looking rundown, you could call an expensive handyman or follow these easy DIY tips to restore your home.

Hurricanes, tornadoes, and other extreme weather conditions can damage your vinyl siding, allowing moisture in your walls and causing structural damage to your home. Repairing these damages is imperative to preserving your home’s structural integrity, and preventing its decline in value.
homeandgardeningguide.com gathered this DIY information so you can knowledgably repair or replace your home’s damaged vinyl siding.
Vinyl Siding Repair – Small Holes
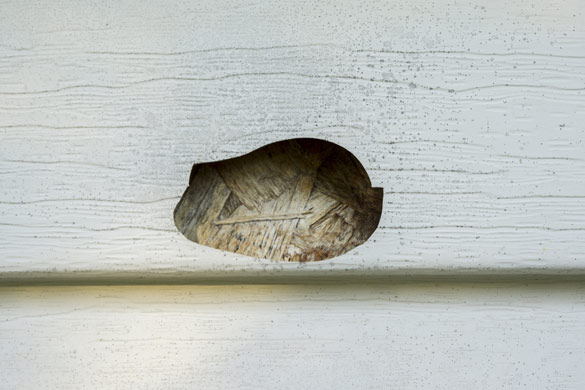
Small holes in your home’s vinyl siding (up to the size of a nickel) are straightforward to repair. The following steps will help you make these repairs in a matter of minutes:
Level the Surface – Using a utility knife or razor cutter, cut away any protruding parts of the edge of the hole. You are creating a flush surface to work with.
Sanding the surface is not recommended, as it may cause off-pattern scratches that are not easily covered up.
Exterior Caulking – Apply a generous amount of exterior caulking into and around the hole (if you are unable to find caulking in the right color, use paintable caulk).
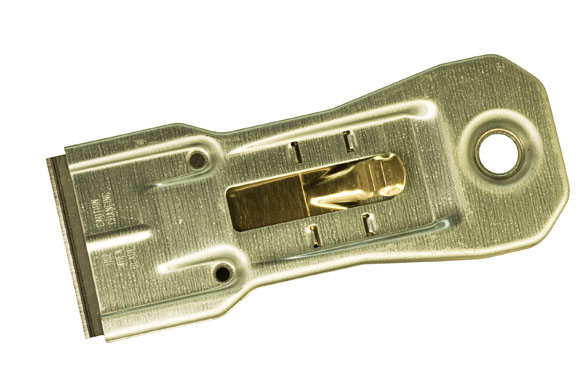
Finish the Repair – Once the caulk has completely dried, use a razor scraper to remove any excess caulk, leaving the repaired area flush with the outside of the siding.

If needed, paint the caulk (once it has cured) with acrylic latex exterior paint matched to the color of your siding.
Vinyl Siding Repair – Medium Sized Holes
Medium-sized holes in your siding (up to 1 1/2 inches) can be repaired similarly to smaller holes. The following steps will help you efficiently make these repairs:
Level the Surface – Again, using a utility knife or razor cutter, cut away any protruding parts of the damaged area. In performing this step, take care to avoid increasing the size of the hole.
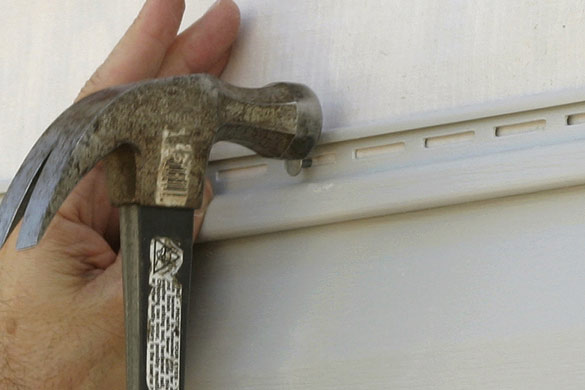
Unlock the Siding – Use a siding removal tool (also known as a zip tool – readily available at home centers), unlock the bottom of the damaged siding far enough to gain access to the back of the siding.
Watch this video to see how to use a zip tool when unlocking vinyl siding.
Seal the Back of the Hole – With the siding unlocked, trim the back edge of the hole so that it is flush with the back of the siding, and apply foil tape to the backside of the hole. Use multiple pieces of tape if necessary to extend the coverage to at least one inch beyond its edge.
High-quality foil tape is preferred over masking or duct tape as it works well in humid and low-temperature conditions without peeling off, and it can remain in place for a decade or longer.
Lock the Siding in Place – Once the hole is covered from the back, lock the siding back in place.
Exterior Caulking – Apply a thin layer of color matched or paintable caulk to the hole. For best results, the layer of caulk should be flush with or slightly raised above the level of the siding.
Finish the Repair – Use a razor scraper to remove any excess caulk once it has completely dried, leaving the repaired area flush with the outside of the siding.
If you used paintable caulk, paint it with acrylic latex exterior paint matched to the color of your siding.
This repair can also be made from the outside without unlocking your siding. Watch this video to see how it is done.
Vinyl Siding Repair – Large Holes and Cracks
Large holes and cracks in your siding will need a solution other than caulking. For this type of damage, a siding patch or replacement is necessary. The following steps will guide you through this repair.
Before proceeding, verify that you have a matching section of siding (wide or long enough to cover all of the damaged area) for a seamless patch or replacement.
Siding Patch – When the damage to your siding is concentrated in a specific location, a patch can be put over it following these steps:
• Using a utility knife, carefully score the top of the siding patch along the base of the nailing strip, then snap off the nailing strip. Siding shears can be used just to cut it off.
• Do not make this cut too low. The upper edge of this patch will be shoved into the joint formed by the original siding.
• Before proceeding, verify that the patch fits firmly in place and is flush along the sides and that the interlocking flange will snap into place*.
• Clean and dry the surfaces that will be in contact with each other.
• Apply a bead of waterproof heavy-duty adhesive to the back of the patch along the top, one inch from the edge.
• Align the patch in its position, then firmly push it into place with the top edge shoved into the joint of the original siding, and the lower interlocking flange snapping into place.
• Firmly press against the top portion of the patch to spread the adhesive evenly.
Watch this video to see how a patch is prepared and applied over damaged siding.
* Some models of siding have an interlocking lower section that won’t allow the “snap in place” to occur. When this is the case, cut off the interlocking flange, leaving an inward fold that will conform to the existing siding. When the patch is firmly in place, use two to three rivets to secure the bottom of it in place.
Applied correctly, this type of patch can last for many years, likely until the house is due for new siding.
Siding Replacement – When the damage to a section of siding is extensive, replace the damaged siding with an entirely new piece.
The following steps will help you successfully replace an entire section of siding:
• Use the zip tool to unlock the siding from above and below the damaged piece.
• Remove (pry out) the nails from the nailing strip.
• Remove the damaged siding.
• Situate the new siding in place of the old piece, locking it into the lower piece.
• Verify that the new piece of siding correctly overlaps the existing siding and that it rests seamlessly into corner fittings.
• Drive nails in the nailing strip of the replacement siding close to where the old nails were driven.
• Do not drive the nails too deep. They should be left flush with the nailing strip to allow for expansion and contraction without buckling.
• Use the zip tool to lock the upper piece of siding to the new piece.

As siding models, colors, and sizes change over time, if there are sections of the damaged siding that can be cut away and stored for future use (as patches), it would be wise to do so.
Likewise, be sure to keep several lengths of the new siding stored away for eventual patches and replacements. Visit homeandgardeningguide.com/repairs/exterior/ for other exterior home repair and maintenance articles.
Your Home’s Vinyl Siding
Don’t let your damaged siding make your home look rundown and shabby when there are easy to use DIY repair and replacement tips.
In this article, you discovered how to quickly and easily repair or replace damaged vinyl siding.
By not taking action when your vinyl siding is damaged or cracked, you are risking costly structural damage, and the need for significant repairs or substantial replacement costs.
Sources:
https://www.vinylsiding.org/installation/installation-manual/other-recommendations/
http://howtobuildit.org/2013/09/20/how-to-repair-vinyl-siding/2/
Visit https://www.homeandgardeningguide.com/repairs/exterior/ for more exterior home repair articles, resources, and tips.